There are many ways to use glue when you are paper quilling.
I started out with the most basic way which is to squeeze out some glue onto a surface and use a toothpick to dip into the glue and dab onto your quilling paper. This method assures that you only get as much glue as needed on your paper. The downside to this method is that it can get messy if something falls into your puddle of glue, and it usually wastes some glue. If you are using inexpensive glue such as Elmer’s Glue-All this is not a big deal. But if you have invested in some special glue it can quickly add up!
Another method is to simply squeeze the glue out of the glue bottle onto your quilling. The success of this method depends on the type of bottle that your glue comes in. If your glue has a twist open cap, this may work. But you do have to be careful not to put too much pressure on the bottle because it is fairly easy for way too much glue to flow out of the hole. This results in an unpleasant mess! Some glues are also sold in special bottles that have fine tips, so this is a fine method for that.
A third method is to purchase a small empty fine tip squeeze bottle to put your favorite glue into. You can also sometimes purchase just a screw on cap with an ultrafine tip to put onto one of your existing glue bottles! This is a great option if you happen to have a bottle that the top will fit on. If not, you may wish to purchase a separate bottle with a fine tip. This is the method that I currently use. I like it because it is a small bottle, so I can take it traveling, it is easy to fill and use, and this particular favorite bottle of mine even has an extra ultrafine tip that can be used! (find the bottle at Custom Quilling or on Amazon
)
Here are some photos of how this favorite bottle of mine works:
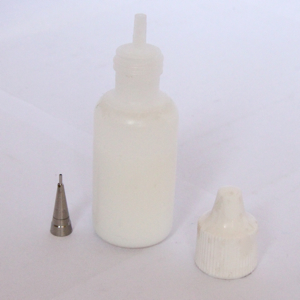
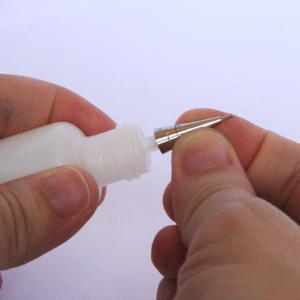
This bottle holds 1/2 ounce of glue. It has a fine tip plastic top that I find fine enough for daily quilling use. It also has an ultrafine metal tip. You just have to press it on top of the plastic tip to use it. I find it helpful with super fine quilling such as making folded roses. It has a plastic screw on top that fits on top of the plastic tip (but you must remove the metal tip to put the top on). This bottle is also the perfect size for fitting into my travel quilling box.
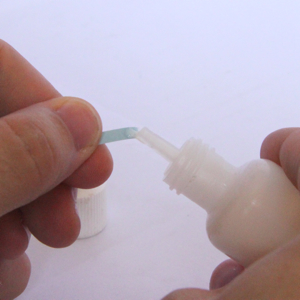
Here you can see that you can just use the standard plastic tip for paper quilling:
Or you may choose to put on the ultrafine metal tip:
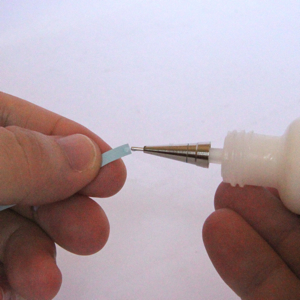
Here you can see that you can get a much smaller amount of glue easily with the ultrafine tip. With the tiny tip you can also get into cracks and crevices to glue folded roses and other fine shapes easily:
When you use the ultrafine tip you have to remove it (or if you have a pin that is the right size you can just stick a pin into it). Just pull it off, and you can see here that there is glue inside. Not to worry!
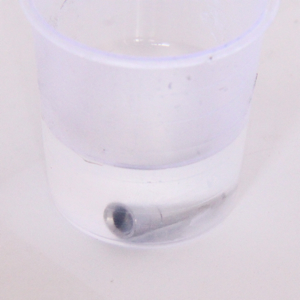
To easily clean my glue bottle I immediately put it under running water (don’t let it fall down the drain!). Then I place it in a little cup with some water. In a couple minutes you could take it out, give it a final rinse, and it’d be fine. But I’m lazy and I actually just keep mine in the little cup of water until I use it again.
What do you do if you forget to clean it out and the glue dries up inside? That happened to me a couple times! I soaked it in hot water for awhile and then used a skinny pin/wire to push out the dried up glue. If the glue isn’t coming out, soak for awhile longer. Make sure the water is HOT to dissolve the glue!
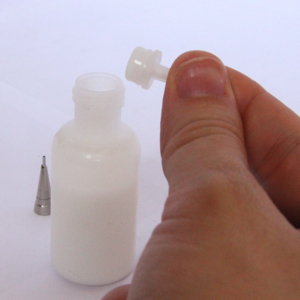
Finally here is how to fill the glue bottle! The top pops out so you can easily fill the glue bottle. But don’t worry, the top does NOT pop off while you are squeezing it to glue! It really is designed very well.
Of course there is the question of what glue should you use in your bottle! Everyone has their own favorite. If you can easily get them where you live you may want to start off with something like Elmer’s Glue All or Elmer’s Craft Bond (find it at Custom Quilling or Amazon). These two work very well for paper quilling. My absolute favorite is PPA (Perfect Paper Adhesive) (find it at Custom Quilling or on Amazon
). It has a great flow rate, is very water resistant when dry, and is not sticky or goopy at all! It can also be used as a sealant/top coat which comes in very handy for me since I make a lot of paper quilled jewelry. (click HERE to see how to use it as a sealant for quilled jewelry)
So there you have it, my favorite bottle to use for glue for paper quilling. What is your favorite way to use glue when you are paper quilling?
Click HERE to view many more tips and tricks for paper quilling, divided into subjects!
Click HERE to view free tutorials for paper quilling projects!
Click HERE to find where you can purchase paper quilling supplies – many sources listed from around the globe!
*All products in this post were purchased by myself.
*This post contains some affiliate links. If you make a purchase through the affiliate link I get a small percentage. I only link to products that I use and love. Thank you for supporting my blog!



Trackbacks/Pingbacks