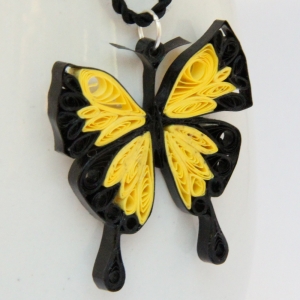
I’m starting a series of posts about paper quilling for all budgets. Paper quilling is one of the few fantastic crafts that can be done on ALL budgets – all the way from FREE to SPLURGE!
Today, in part 1, I’m going to talk about how to do paper quilling for FREE!
I know this can be done because when I started paper quilling at age 10 I had no money for tools, paper strips, etc. I checked a book out of the library and used all of the below supplies to get started for free! It wasn’t until a couple years later that I got my first quilling tool, and it wasn’t until I was 19 that I bought my first pre-cut quilling strips!
So here are the supplies and techniques to get started with paper quilling at the most minimal cost as long as you have all of these supplies at home:
- Tool – Use a slender pointed object to twirl your paper. I used a toothpick, but you could also use a hatpin, a skinny knitting needle, a long sewing needle, etc.
- Paper – Cut your own paper strips. When I first started I had only lined school paper. I would color the paper with markers or paint it, and then cut on the lines with scissors. This is fine for kids, but for a more professional look, I graduated to this method: Choose a piece of colored paper. Using a pencil and a ruler mark off increments along one side for how wide you want your strips. I usually did 1/8″ or 1/4″. Mark off the same increments on the opposite side. Place your paper on a cut-safe surface such as a cutting pad, a thick piece of cardboard, etc. I used to use the back of a notebook. Place a ruler on the paper, following the marks you made, and use a razor blade or exacto craft knife to cut the strips. Keep moving the ruler and cutting the strips. Click here to see a picture tutorial for how to cut your own strips!
- Workboard – A thick piece of styrofoam board works well as a quilling workboard, or a few pieces of corrugated cardboard taped together. Put a piece of wax paper or a plastic sheet (like a page protector) over the board so that the glue won’t stick to the board.
- Glue – there are many glues that work just fine for paper quilling. Here is a post about different glues.
- Circle Sizer – There are several things you can do to help make sure your coils are the same size. The most simple (but not easiest) is to make one coil the size you want. When you make the next coil, let it expand to the same size by holding it on top of the one that is the size you want. When they are the same, glue it shut. You can also make yourself a circle sizing board as I did when I first started. I took a piece of heavy duty styrofoam board and traced circles on it in various sizes. I traced several of each size. Then I put four pins around each circle, trying to keep the pins either right on the circle I drew, or right outside, but keeping them all the same. When you make a circle place it inside the four pins and let it expand. It will expand to the size of the circle you drew! Glue it shut and then remove a pin to get your circle out more easily. put your pin back into the same hole. (Click here to view a picture tutorial on how to make this!) One reader said that she uses a screw sizer that she got in the mail for free. How handy! There are some rulers and stencils you can buy that also have various size circles in them.
- Patterns – Youtube, blogs, the internet is full of free quilling patterns and wonderful inspiration! Here are some free patterns here on this blog.
So you see, even if you don’t have any money to put into paper quilling to start off, that’s no reason not to give this awesome craft a try! So go ahead and cut some strips, grab a tool, and get started!
Click here to view free quilling tutorials!
Click here to view more quilling tips and tricks, sorted by subject!
Click here to view a list of places to buy quilling supplies, sorted by country!


it ia very intresting work.
I’ve been reading here and there. You write very good! I liked this text in particular because at this stage of my life I can’t afford to spend a lot of money in “experiments”. It’s good to read this text you wrote even knowing that you have a business around quilling. I think you must be a good person. I would buy from you but I live in Portugal. Probably I would have to pay more in stamps than for the materials!! And maybe face some problems with the “alfandega”, what’s the word for it, customs? Some friends I have pay extra money to get things they buy abroad outside Europe, it can be a bore sometimes (not always)!This text was a great incentive because I don’t have a needle or any proper paper for my first experiences. Just the glue!!! If I’ll do anything I’ll blog about it and will not forget to mention you. I will also create a board on Pinterest and add you and your works if that’s ok!;) Thank you again!
Thank you for your comment 🙂 If you are curious about how much shipping would be, just go to my shop, add some products to your cart, and go to the checkout. You will get a shipping estimate before you go to the payment page so you can see if it would be too much 🙂 And yes, I believe sharing information is more important than guarding it and I would rather everyone, irrespective of budget, can have a chance to try this fun craft! When you order things from overseas, check to make sure the total is below the customs amount, you can check with your customs department to see what this is. When orders are large, they are stopped by customs, but not smaller ones. At least that is how it works here in Malaysia, so I always order smaller packages from overseas 😉 Thank you for adding my pages to Pinterest!